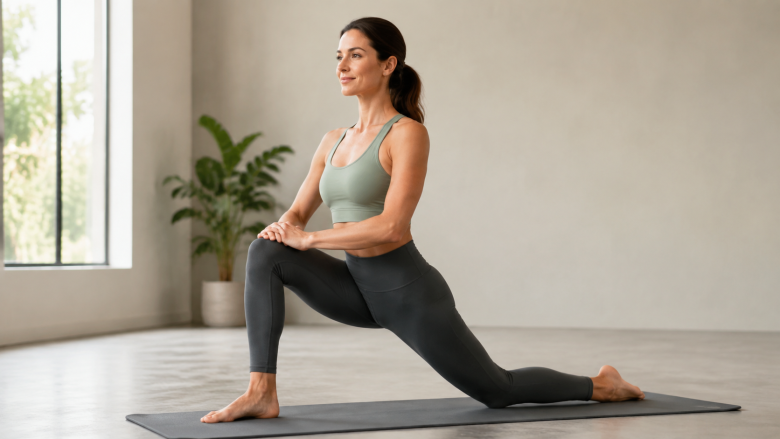
Why Most Hip Mobility Routines Do More Harm Than Good
I've been a movement coach for years, and I still remember the first time I tried to fix my own tight hips. I was young, impatient, and convinced that more stretching meant faster results. I bounced into a deep lunge, held my breath, and pushed until I felt a sharp pull in my groin. That was the day I learned a hard lesson: the way most people do hip mobility routines is wrong.
Google the topic and you'll find endless 8-minute workouts, 90/90 drills, and pigeon pose variations. What you won't find is honest advice about the mistakes that keep you stiff - or worse, get you injured. That's why I wrote this guide. It's built on a simple principle: move well first, then move more. The routine below takes seven minutes, requires no equipment, and directly addresses the five most common errors I see in the clinic and in my own practice.
If you have ever felt a sharp pinch in your hip during a stretch, or if you've been doing daily mobility work for months without progress, this article is for you. We'll start by naming the elephant in the room - the mistakes nobody warns you about - and then give you a sequence that sidesteps every single one.
5 Common Mistakes That Sabotage Your Hip Mobility
Most people don't realize that the biggest barrier to better hip mobility isn't tightness - it's technique. Here are the five mistakes I see most often, and why they matter.
1. Bouncing Into End Range (Ballistic Stretching)
When I first tried to loosen my hips, I would bounce at the end of a lunge. It felt like I was making progress. In reality, I was triggering a protective reflex called the myotatic stretch reflex. Your muscles contract to protect the joint when they sense a sudden stretch, which actually makes them tighter. The research on acute stretching shows that ballistic bouncing increases injury risk without improving range of motion. Replace bouncing with slow, controlled movement - you'll feel the difference in one session.
2. Skipping the Warm-Up
This one is almost universal. People roll out of bed, drop into a deep squat, and wonder why their hips feel locked. Your joints are lubricated by synovial fluid, which is like cold honey when you're at rest. It takes about 5 minutes of gentle movement to get that fluid moving. Without a warm-up, you're effectively stretching cold rubber bands - they can snap. I always start with a few minutes of walking or gentle hip circles, even if I'm short on time.
3. Holding Your Breath
It sounds basic, but I see it constantly. When you hold your breath during a stretch, your diaphragm can't move, your rib cage locks, and your pelvis can't tilt properly. This limits hip flexion and rotation. The thing nobody tells you about breathing is that it's not just about relaxation - it's about mechanical alignment. Exhale as you move into the stretch, and inhale as you release. Your hips will follow.
4. Ignoring Pain in Favor of 'Good' Pain
There's a difference between a stretch that feels intense and a stretch that pinches, stabs, or burns. Many people push through sharp pain because they think it's 'working.' It's not. Sharp pain is a sign of impingement, typically from the hip socket or labrum, or from overstretched ligaments. If you feel a sharp pinch in the front of your hip during a lunge, back off immediately. Mobility should feel like a dull, satisfying pull - never like a knife.
5. Focusing Only on Stretching, Not on Control
Mobility isn't just flexibility. It's the ability to actively control your joint through its full range of motion. If you can only move your hip passively (by pulling it with your hands), you haven't built usable mobility. That's why this routine includes active movements where you engage your muscles, not just passive stretches. You need both: passive to increase length, active to lock it in.
The 7-Minute Hip Mobility Routine: Avoids All 5 Mistakes
This sequence is designed to be done in exactly seven minutes - no more, no less. It's beginner-friendly, but it's also effective for experienced movers who have been stuck with tight hips. Each exercise includes form cues and modifications for limited mobility or injuries. I've used this routine with clients recovering from hip replacements and with professional athletes. It works because it respects your body's limits.
Before you start, take 60 seconds to walk around the room or do slow leg swings. This is your warm-up. Do not skip it. Then follow the order below. Rest as little as needed between exercises - you want to keep moving, but don't rush.
Minute 1-2: Cat-Cow With Hip Circles (Standing)
Stand with feet hip-width apart, hands on thighs. Inhale, arch your back, and gently circle your hips to the right, then forward, left, and back. Exhale as you round your spine and reverse the circle. Do 5 circles each direction.
Form cue: Keep your knees soft. Imagine you're drawing a large circle with your tailbone. If you feel any clicking or catching in the hip joint, make the circle smaller and slower.
Modification for limited mobility: If standing is uncomfortable, sit on a chair and do the same circle with your pelvis. You can also hold onto a wall for support.
Minute 2-3: Deep Squat With Supported Heels
Lower into a squat with feet slightly wider than hip-width, toes turned out. If your heels lift off the ground, place a rolled-up towel or yoga block under them. Hold for 30 seconds, then gently rock side to side for another 30 seconds.
Common mistake: Dropping your chest forward. Keep your spine tall and your chest proud. Use your elbows to gently push your knees open if needed.
Modification for knee pain: Place a chair behind you and lower only as far as you can without pain. You can also do this lying on your back with knees bent and feet on the floor (happy baby variation).
Minute 3-4: Half-Kneeling Ankle-to-Hip Rock
Kneel on the floor with one knee down and the other foot flat in front, knee bent at 90 degrees. Place your hands on your front thigh. Gently rock your hips forward, feeling a stretch in the back hip and the front of the front hip. Rock back to neutral. Repeat 10 times, then switch sides.
Form cue: Keep your pelvis square - don't let your back hip hike up. Imagine your hip bones are headlights shining straight forward.
Modification for knee discomfort: Place a folded blanket under the kneeling knee. If the front knee hurts, reduce the angle by moving the front foot further forward.
Minute 4-5: 90/90 With Hip Lift (Active)
Sit on the floor with both knees bent to 90 degrees - one leg in front of you, the other behind you. Your front shin should be parallel to your torso, and your back shin parallel to the front shin. Place your hands on the floor for support. Keeping your torso upright, lift your back knee an inch off the ground, then lower. Do 10 reps, then switch sides.
Common mistake: Letting your front knee flop outward. Keep it stacked over your front heel. If you can't lift the back knee, just press it down into the floor to engage the glute.
Modification for limited hip rotation: If you can't sit this position without pain, sit on a cushion or start with just the front leg crossed over the other (like a modified pigeon).
Minute 5-6: Supine Figure-Four With Active Pull
Lie on your back with both knees bent, feet flat. Cross your right ankle over your left knee. Reach your hands through the gap between your legs and clasp your left hamstring or shin. Gently pull your left leg toward your chest. Hold for 30 seconds, then actively press your right knee away from your body while keeping your left leg stable. Release, then switch sides.
Form cue: Keep your head and shoulders relaxed on the floor. If you feel a pinch in the front of the crossed hip, don't pull the leg as far - instead, focus on pressing the knee away.
Modification for lower back sensitivity: Place a pillow under your head. If pulling the leg causes back pain, keep the uncrossed foot flat on the floor and just let the crossed leg rest.
Minute 6-7: Standing Hip Flexor Stretch With Glute Activation
Stand tall, then step your right foot back about two feet, landing on the ball of your foot. Keep your left knee bent and stacked over your ankle. Squeeze your right glute and tuck your pelvis under slightly. You should feel a stretch in the front of your right hip. Hold for 20 seconds, then switch sides. Repeat once on each side.
Common mistake: Arching your lower back. This turns the stretch into a lumbar stretch, not a hip flexor stretch. Keep your ribs down and your core engaged.
Modification for balance issues: Hold onto a wall or chair. If the back knee hurts, stay on the ball of the foot but don't push too far forward.
How to Customize This Routine for Injuries or Limited Mobility
Every body is different. If you have a history of hip impingement, labral tears, or arthritis, the standard version of these exercises may not be safe. Here's how to adapt each movement.
For hip impingement (FAI): Avoid deep squats and deep 90/90 positions. Stick to the standing cat-cow and the supine figure-four with a very gentle pull. Focus on rotation in a pain-free range. Most people with impingement feel better with a neutral pelvis - don't tuck or arch excessively.
For hip replacement: Follow your surgeon's restrictions. Usually, you'll want to avoid crossing the midline (no figure-four stretch) and avoid deep end-range flexion. The half-kneeling rock is safe if you keep the back knee behind the hip. Always consult your physio before starting a new routine.
For general stiffness or arthritis: Warm up longer - aim for 3-5 minutes of walking first. Use the modifications that reduce joint loading (e.g., seated or supine versions). Move slowly and never force a stretch. If you experience sharp pain, stop immediately.
If you're building a daily movement practice, consider pairing this routine with a 10-minute daily stretch routine for beginners to address other tight areas like the hamstrings and chest. Alternatively, if you want to incorporate mobility into your morning, our guide to building a simple morning stretch routine offers a framework that complements this hip-focused plan.
Self-Check: Are You Doing It Right?
Before you wrap up, run through this quick checklist. It takes 10 seconds and will save you from reinforcing bad habits.
- Are your hips square? In the half-kneeling rock and 90/90, check that both hip bones face forward. If one juts forward or back, you're losing alignment.
- Are you moving through full pain-free range? Did you feel any sharp pinch, stabbing, or burning? If yes, you pushed too far. Back off by 20% next time.
- Is your breath steady? You should be able to inhale and exhale calmly. Holding your breath means you're tightening, not releasing.
- Are your shoulders relaxed? Many people shrug up to their ears during stretches. Drop your shoulders away from your ears.
- Did you move with control, not momentum? If you bounced or swung into any position, slow down. Controlled movement builds long-term mobility.
Make this checklist a habit. After a week, you'll notice that your hips feel more open and you're less likely to compensate with your lower back.
Beyond the 7 Minutes: What to Do When You're Stuck
Sometimes, even a perfect routine doesn't unlock your hips. If you've been consistent for 3-4 weeks with no improvement, consider these factors:
Your sitting posture. If you sit for 8+ hours a day in a chair that forces your hips into flexion, you're undoing your mobility work. Try a standing desk break every 30 minutes, or use a small cushion under your sit bones to tilt your pelvis forward. Our walking routine guide can help you break up sedentary time.
Your sleep position. Sleeping on your side with your top leg dropped forward can lock your hip in external rotation. Tuck a pillow between your knees to keep your pelvis neutral. For more on sleep and movement quality, see our 7-step bedtime routine for better rest.
Stress and tension. Your hips are a common storage site for emotional tension. If you're under chronic stress, your psoas and hip flexors may remain tight no matter how much you stretch. Incorporate gentle movement or breathing exercises - the routine above already includes breath awareness, but you can extend the breathing part to 2 minutes if needed.
Lastly, remember that mobility is a journey, not a destination. I've been doing this work for over a decade, and I still have days where my left hip feels like a rusty hinge. The difference is I know how to listen to it. Use this routine as a starting point, not a cure-all. If you have persistent pain, see a qualified professional - a physiotherapist or an experienced movement coach - to rule out structural issues.
Now go move. Seven minutes is all you need.